Updating the PostgreSQL version of your application can be a daunting task, especially when critical documentation feels scattered across numerous AWS pages and lacks the clarity of visual guidance. The uncertainty surrounding such a critical process can make the experience even more stressful.
Here we will be going over a process that the Superfiliate team has already ran a handful of times at different moments, with zero issues. Along the way, we’ve identified common pitfalls, refined best practices, and documented everything to share on this post with you.
Last tips before we dive into it:
- Don't do this alone; at least if it’s your first time doing it. An extra pair of eyes may be invaluable to double-check the details. And an extra pair of hands too, if you do anything that goes wrong, and you need to quickly fix it.
- Double-check Postgres changelogs if you are using something that feels very custom. But you are just using bread-and-butter things, it is unlikely that anything there will affect you.
- And to be more sure there are no breaking changes configure your test-suite and dev environments to run against the NEW version for a couple days. See if you have any unexpected failures, or developers complaining.
- MAKE BACKUPS! This is super easy and quick to do using the Manual Snapshots on RDS left sidebar. You won't ever feel sorry for having had an extra backup.
Setting up
- We need to make sure the existing deployment has the
rds.logical_replicationparameter turned on.- This is not turned
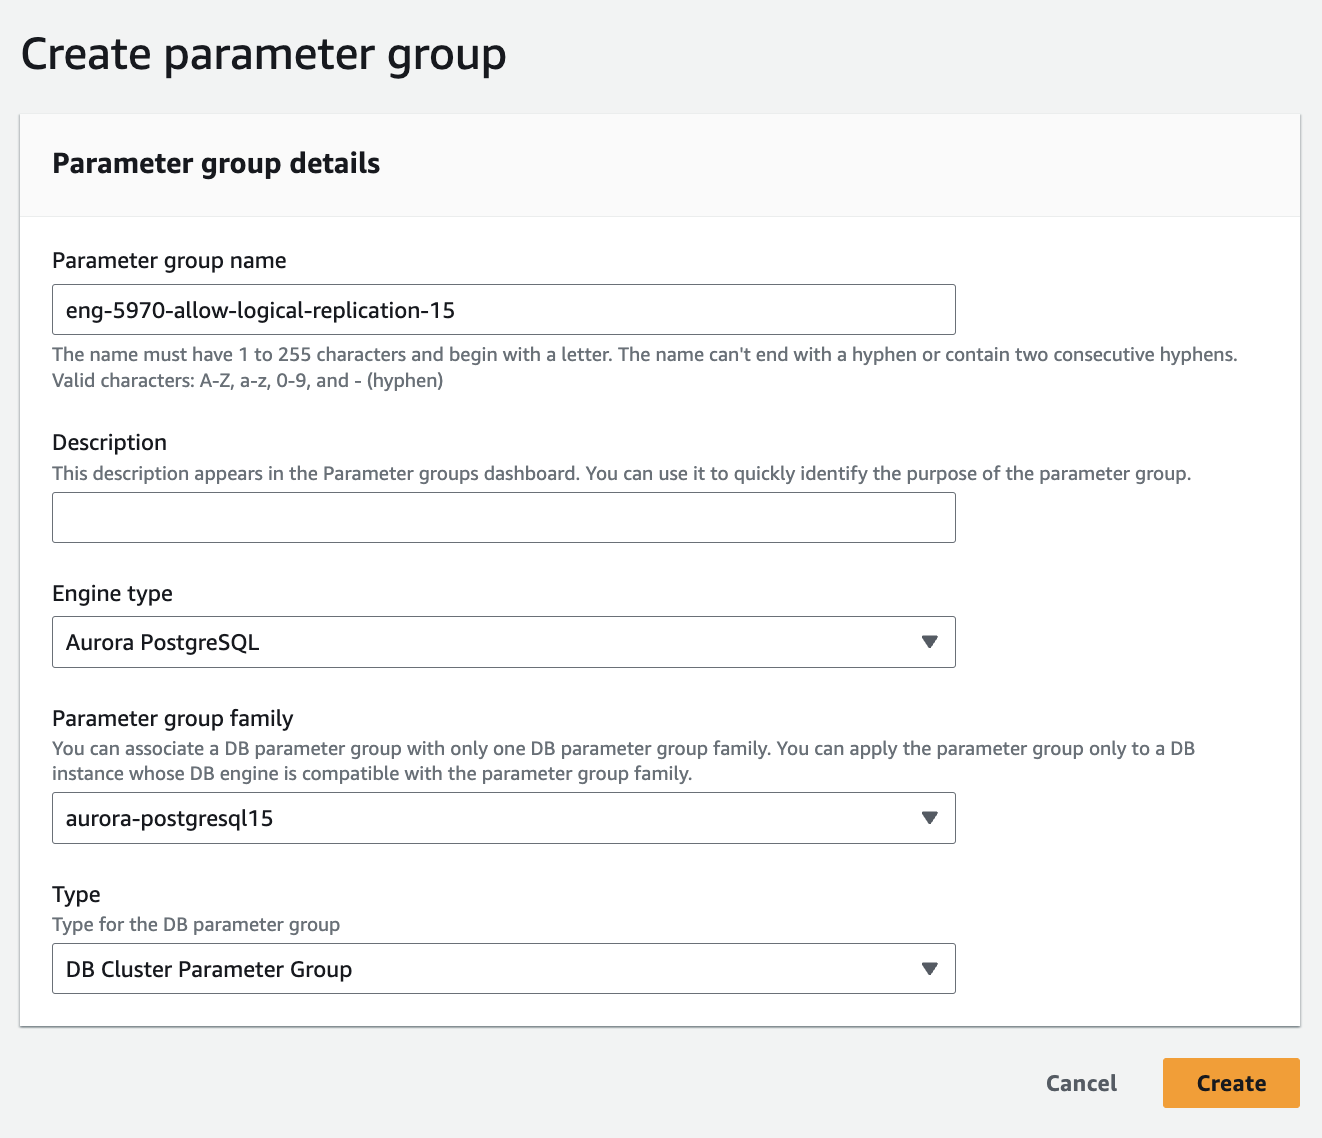
onfor the default “Parameter Group” that RDS creates for you. - If you are not using a Custom “Parameter Group” yet, you will need to create one. It is quite simple, the screenshot shows an example of creating one based on the Postgres 15 defaults RDS offers. You should pick your CURRENT version here, not the version you want to upgrade to.
- This is not turned
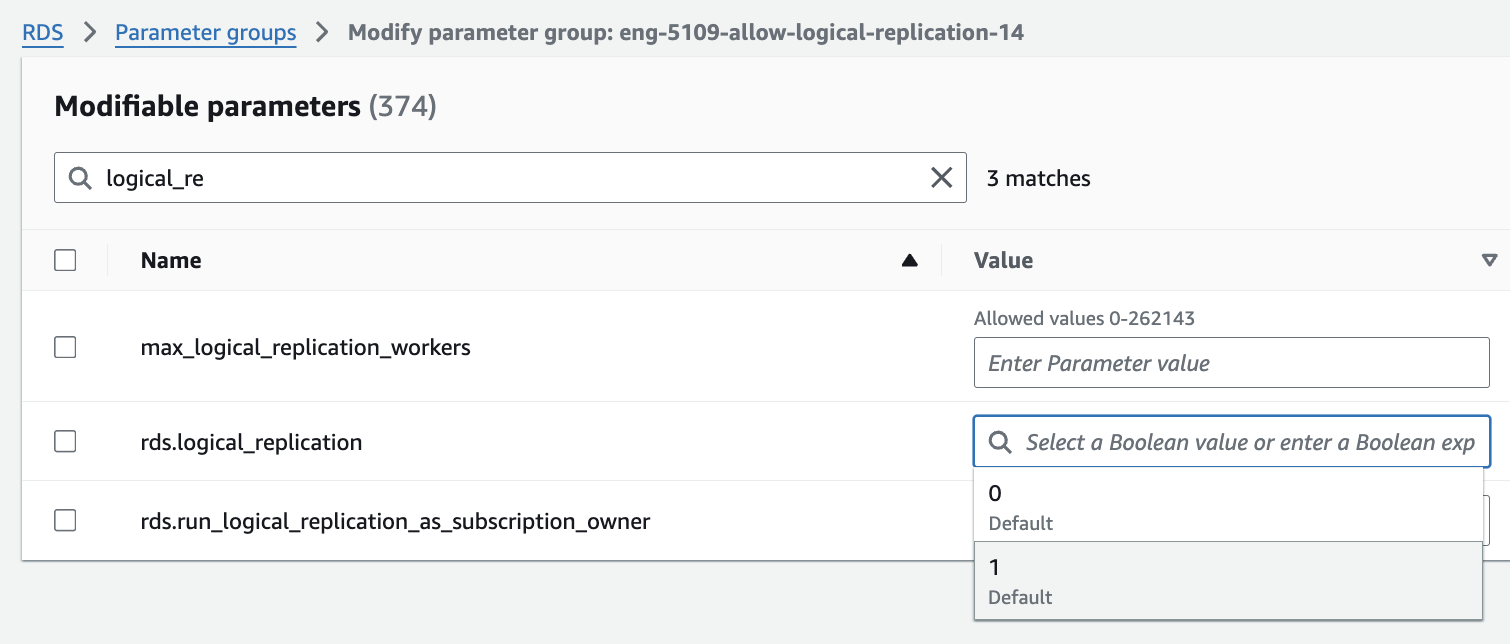
- With the Custom "Parameter Group” already created, you can click to edit it, on the top left, and search for rds.logical_replication. And toggle its value to 1 , like shown on the screenshot.
- Then, make sure this Parameter Group is applied to your existing cluster. If it is not, you may want to wait for the next Maintenance Window for it to be applied. Or click to apply it immediately with its own risk.
- One big suggestion here is that you already prepare the Parameter Group of the next version too. So you don't need to do this again the next time you update versions, nor have extra waits for Maintenance Windows, etc.
- Same process as above, but picking the version you want to upgrade to.
- You don't need to apply it to any cluster yet, this will come in later.
Slowing down
Background processing
- On our infra we have things like Sidekiq and SolidQueue that are used to run background jobs, and many of them are not time-critical. You may have similar things with Celery, SQS+Serverless, etc.
- We opt to pause processing on all the non-time-critical queues. It shouldn't really matter at the end of the day. But at least we know that if something goes wrong, it may be easier to recover things that happened since our backup, because most of them would just be still waiting on queue.
Deploys
- Depending on your deploy process it may try to automatically run DDL migrations, like adding columns or tables. These commands are not supported by RDS Blue/Green replication, and you will have to start over, or manually tweak the Green deployment if they happen.
- We turn off the CD pipeline, and advise the team on Slack that new deploys are paused for a while.
- We opt to do these updates in the morning, a couple hours before most Users and Devs start to get online. But also after we've already handled any large bulk tasks/webhooks that like to happen around midnight and very early hours. But may be a bit hard to convince that extra pair of eyes to wake up at this alternative time 😅.
This is a great moment to do an extra backup!
Blue/Green
- On RDS, on the overview of the existing database/clusters, select the current cluster that you want to upgrade. And on "Actions” click "Create Blue/Green deployment - new”.

- You will be warned of some of the limitations regarding this, read them carefully, and proceed.
- Choose a temporary name to identify this blue/green process, it will be removed later…
- Pick the version you want to update to.
- If you already prepared a new Parameter Group for the new version, pick on first select, for the "cluster”. So you don't need to set up the
rds.logical_replicationnext time you want to update. - Read all the warnings carefully, and click to proceed. You will be redirect back to the database view, and you should see some provisioning in progress. Will look something like this:
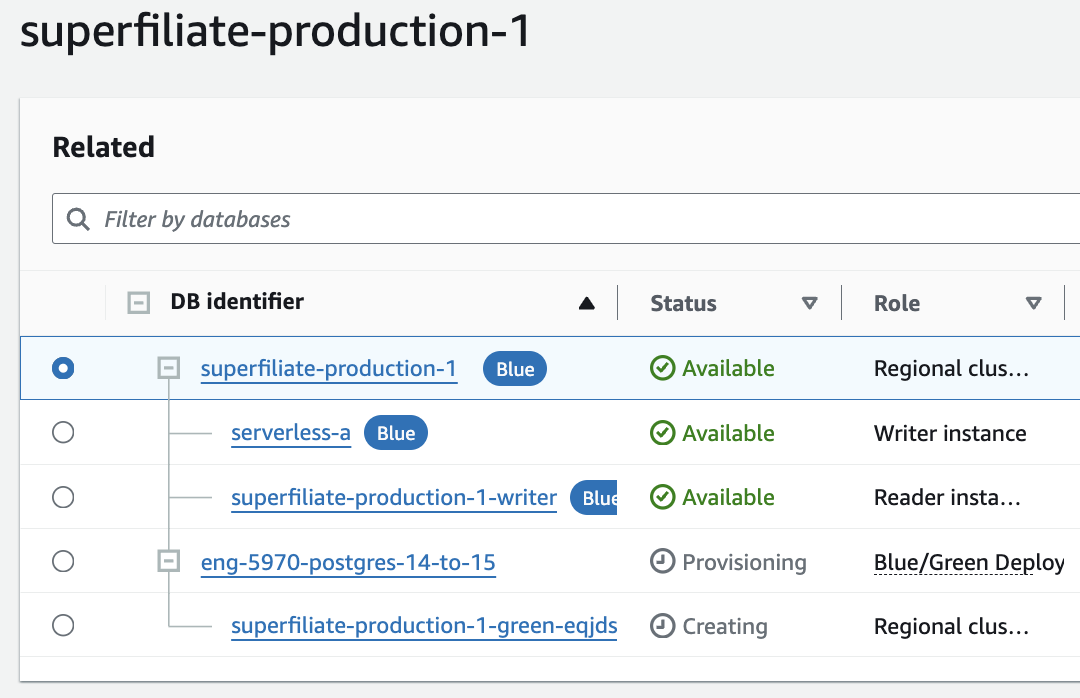
- This can take a while, even more if you have many replicas, and a ton of data. Be prepared to wait at least ~30 mins.
- First you will see the cluster getting prepared, then the writer instance, then the read replicas:
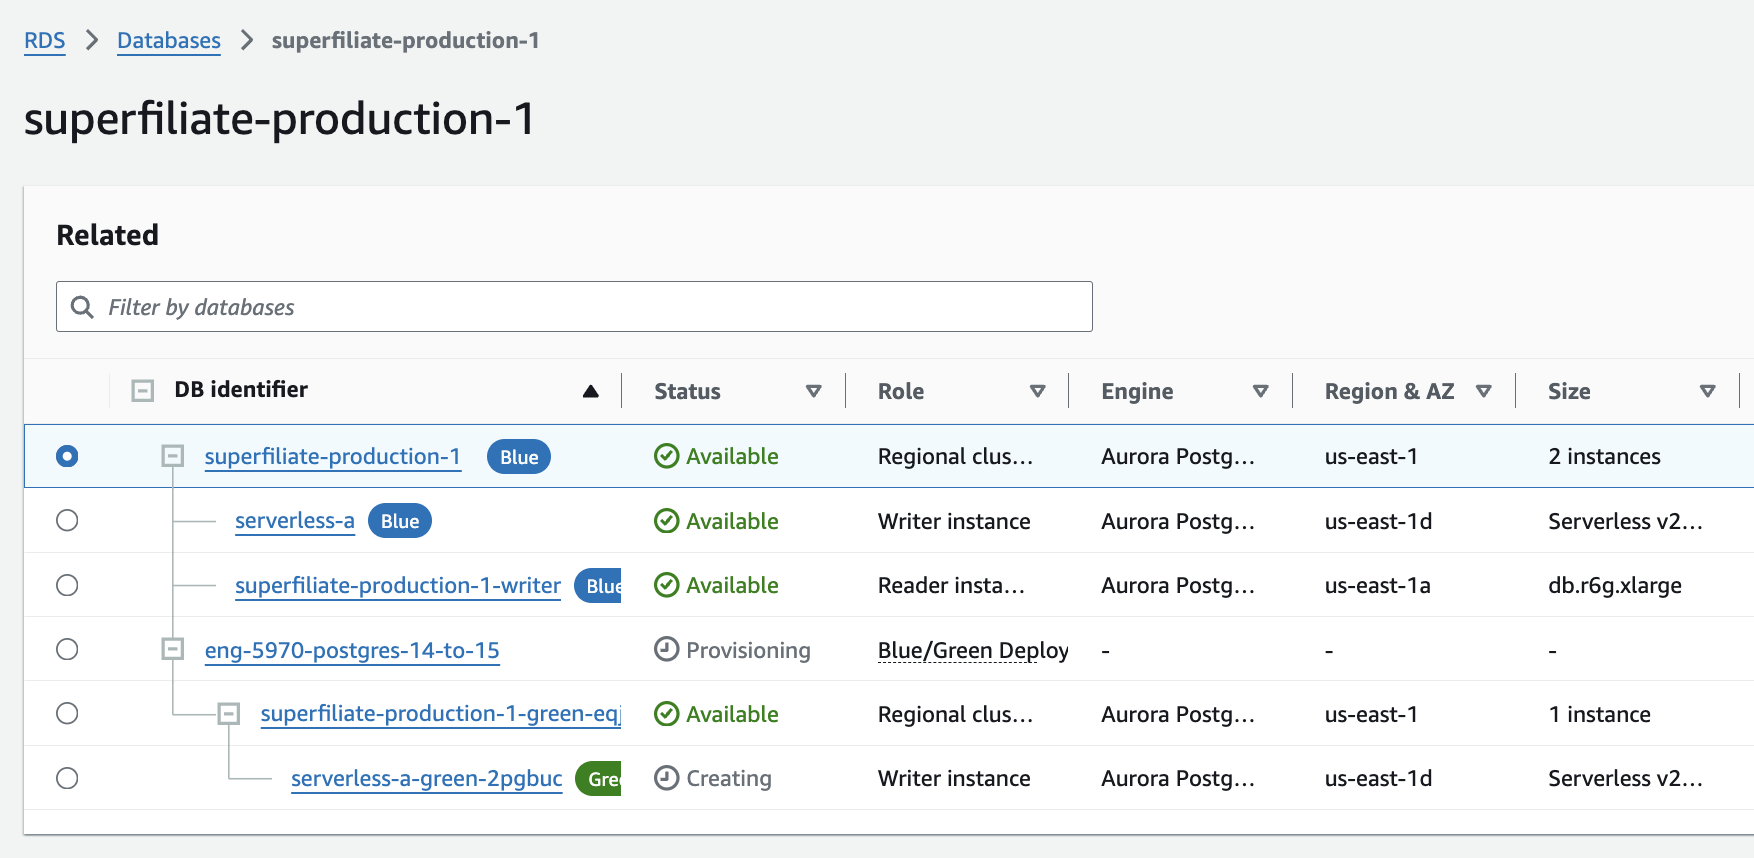
- When everything on the new Green cluster is shown as “Available” it means both cluster should be in sync.
- To prevent a huge performance hit when Green replaces Blue, you should enter the configuration of the Green cluster, find its write URL, and connect to it. The login credentials should be the same that you already have been using on the old cluster. Then run an
ANALYZE VERBOSEto recalculate statistics on your tables, that is used by the query planner. This can also take a while to run, be prepared to wait ~30 mins again. - Now, for the most important action 🪄! Back to the view of the databases, select the blue/green deploy, and on the top-right choose "Switch over”.
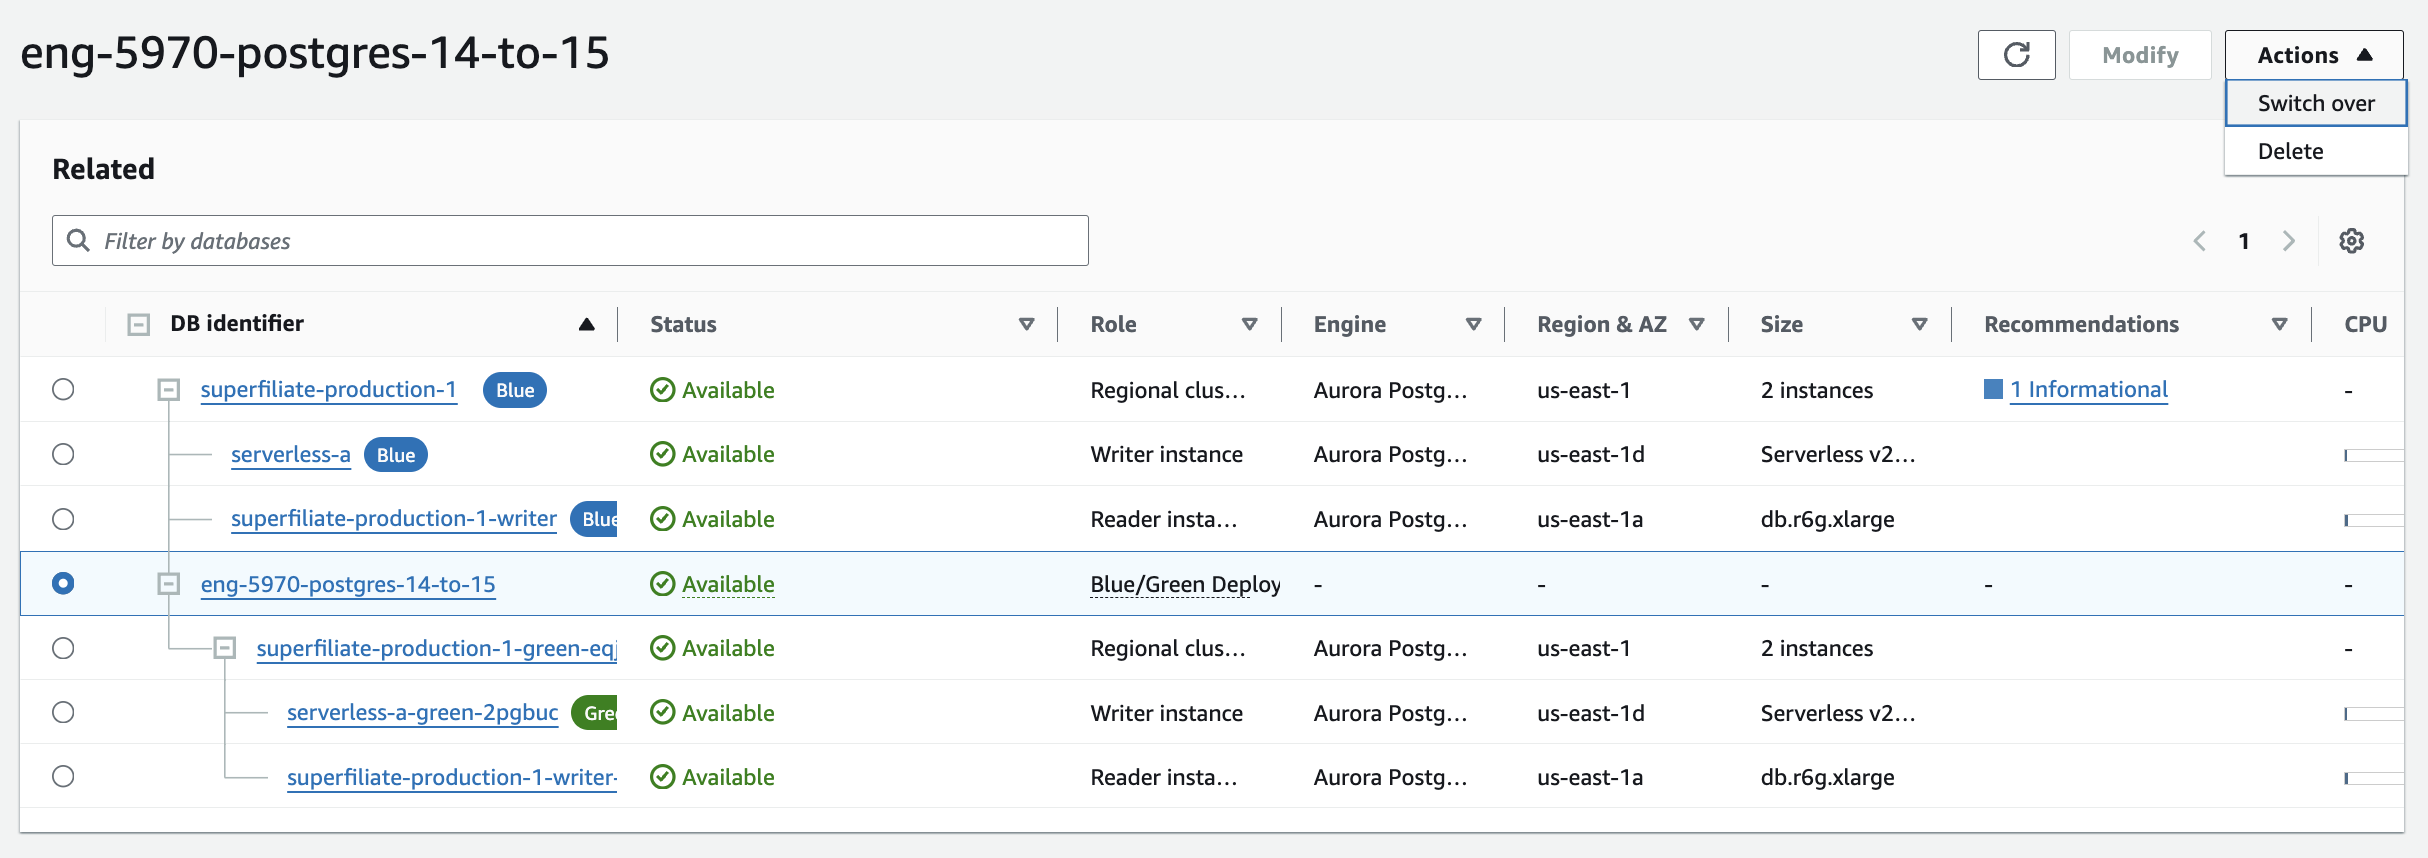
- We usually see the whole switch taking less than ~2 minutes, and the app may hit a few 5xx errors depending on how your framework does connection pooling, figures out the IP of the new cluster on the updated DNS, and when actually starts hitting the new cluster. But it’s all worth it, we usually get prepared to handle up to 1 minute of downtime.
Speeding up
- If you paused some of you background/queue processing, turn it all back on.
- If you had turned off you CD pipeline, turn it back on.
Clean up old cluster
- You will be left with an "Old Blue” and "New Blue” clusters running. You can leave them like this for couple hours to be 100% sure you don't need to roll any of this back.
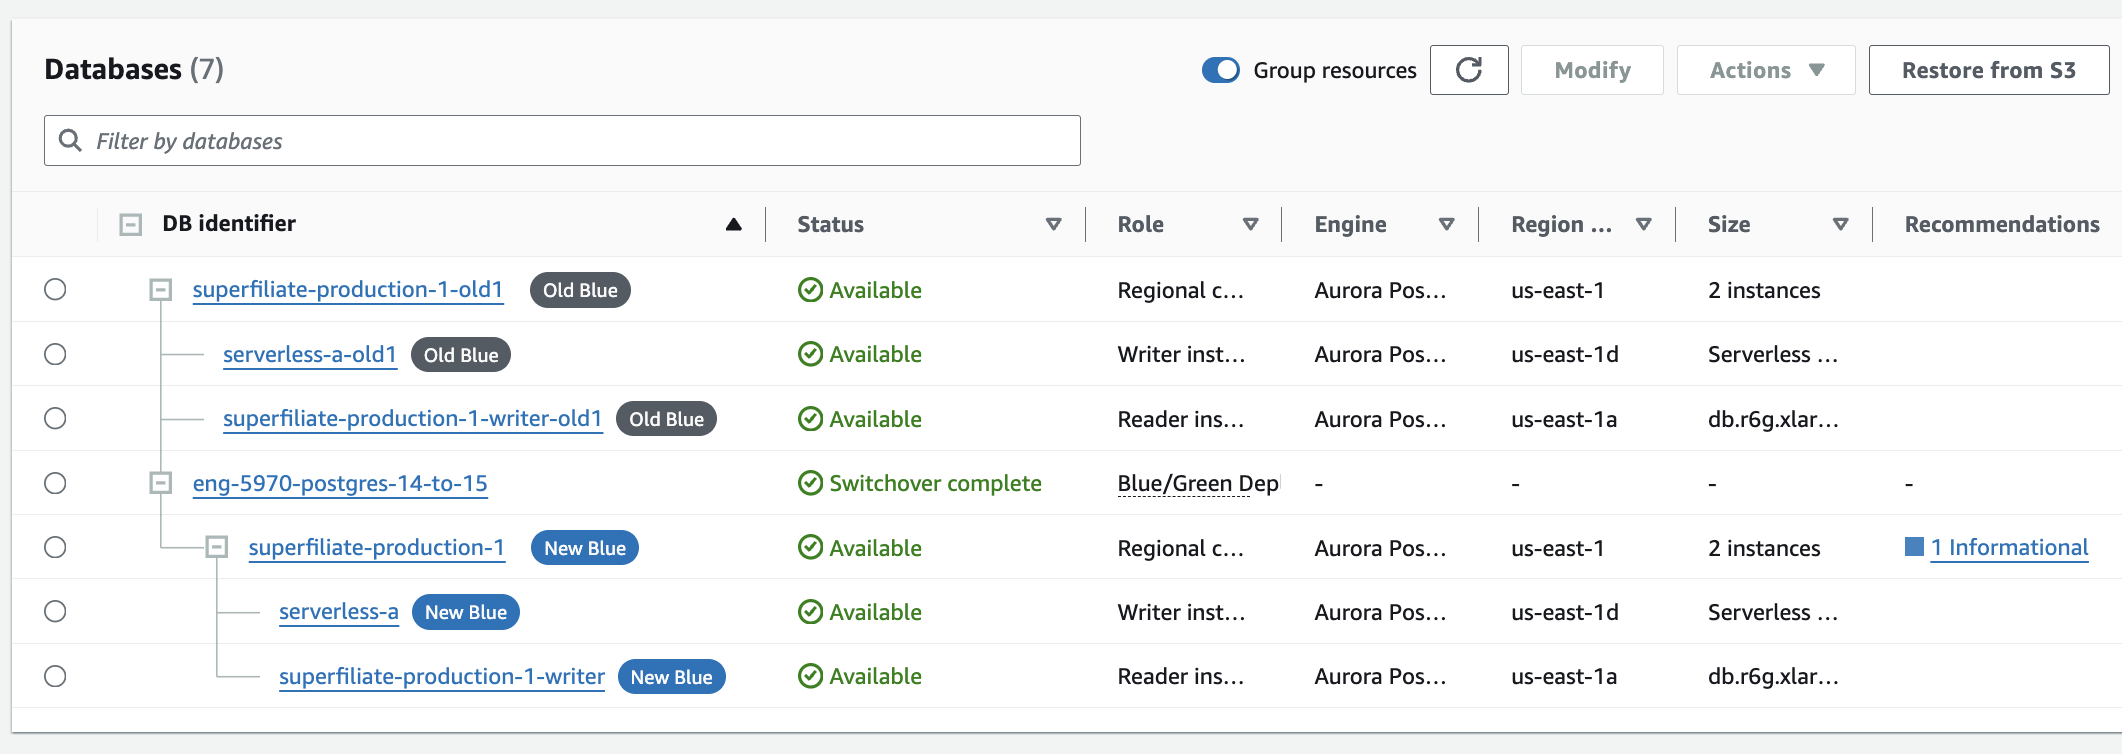
- Once you're confident everything is in order, it’s time to delete some resources—but let’s avoid any heart-attacks. First, click Modify on your new cluster and triple-check that "Deletion Protection" is turned ON. Then, for your old cluster, click Modify and ensure "Deletion Protection" is turned OFF. With these safeguards in place, RDS will help ensure you don’t accidentally delete the wrong cluster.

- Start by removing the resource identified with the Role "Blue/Green Deploy”. Yes, it is a bit counter-intuitive because your new cluster is shown "inside” that resource. But UI has never been AWS's strongest point 😅. You will then see the resources getting spread out, like this:

- Now, delete each of your OLD cluster Reader replicas.
- After that, delete the OLD cluster Writer.
- Finally, delete the OLD cluster itself, that wouldn't have anything inside it anymore. Here AWS will ask you some more confirmations. Good to let it make a final backup, and also allow it to keep the old Snapshots you had of this cluster.
That should be it! A few days/weeks later you can come back to the Snapshots and clean up any Backups that you didn't end up needing.
Future Improvements
- It would be exciting to see RDS fully support the Blue/Green deployment process when integrated with an RDS Proxy. This enhancement could potentially eliminate the brief instances of 5xx errors we still experience, bringing downtime to a complete zero.
- Additionally, improving the UI for deleting a "Blue/Green Deploy" would be a welcome change. The current experience of clicking "Delete" on something that appears to house your production database can be nerve-wracking, and a more intuitive design could help alleviate that anxiety.


