Event sourcing is designed to capture and record every change a data record experiences, making auditing easier and ensuring complete traceability. This enhanced data reliability makes event-driven architectures particularly popular in financial applications. While Rails doesn't include event sourcing natively, there's a powerful gem for that: Sequent. Sequent brings event sourcing to Ruby, working seamlessly with or without Rails.
In this article, we'll dive into Sequent's core classes by building a Rails app called Pocket, which will track and manage money transactions.
Let’s get started and create a new Rails app! Once we've initialized the Rails app, we can start incorporating the Sequent files. We'll be using PostgreSQL as the database, which is the only supported option for Rails according to Sequent's documentation.
The first thing you have to do is to add the sequent gem to your Gemfile, and then run bundle install:
gem "sequent"Before we actually kick things off, let's first just create a regular user table with Rails. You can do it by adding a new migration:
class CreateUsers < ActiveRecord::Migration[7.2]
  def change
    create_table :users do |t|
      t.timestamps
      t.string :name, null: false
    end
  end
end
After the migration is created, we can run it by using the regular rake db:migrate. We’re gonna be adding the model later on.
Config files
Now, let's start adding the sequent config files. The first step is to update your config/database.yml to include the sequent schema search path:
default: &default
  adapter: postgresql
  pool: <%= ENV.fetch("RAILS_MAX_THREADS") { 5 } %>
  schema_search_path: "public, sequent_schema, view_schema"
  timeout: 5000

development:
  <<: *default
  database: pocket
  username: postgres
  password: postgres
  host: localhost
After that we add the sequent initializer file, just like it’s instructed on the official docs:
# config/initializer/sequent.rb

require_relative '../../db/sequent_migrations'

Rails.application.reloader.to_prepare do
  Sequent.configure do |config|
    config.migrations_class_name = 'SequentMigrations'
    config.enable_autoregistration = true
    config.event_store_cache_event_types = !Rails.env.development?

    config.database_config_directory = 'config'

    # this is the location of your sql files for your view_schema
    config.migration_sql_files_directory = 'db/sequent'
  end
end
As mentioned in the initializer, we also need to create a SequentMigrations class. Similar to Rails, Sequent has its own migration system, though it differs somewhat from Rails migrations. These differences will become clearer as we progress through the tutorial. Let's start by building the SequentMigration file:
# db/sequent_migrations

VIEW_SCHEMA_VERSION = 1

class SequentMigrations < Sequent::Migrations::Projectors
  def self.version
    VIEW_SCHEMA_VERSION
  end

  def self.versions
    {
      '1' => [
        WalletProjector
      ],
    }
  end
end
There are two interesting things we can highlight here:
- This file is responsible for taking care of each migration we'll have on sequent. If you want to add a new column, a new table, change a column type or etc, you need to increment the
VIEW_SCHEMA_VERSIONnumber and add the new version item on the hash returned by theself.versions - In this initial version, we already include an item representing the first version, with its value being the
WalletProjector, a file we will create later. By referencing this file here, Sequent will look to theWalletProjectorwhen running the migration and apply the necessary database changes to align with the table structure defined for the projector.
Domain files
Ok, now that we have our configs and migrations in place, we can finally start defining our domain. A general sequent project structure is like this (ignoring the Rails files):
app/                         # Non-domain application logic
  projectors/                # Subscribe to events and write to records
  records/                   # Ephemeral view tables (ActiveRecord models)
db/
  tables/
    post_records.sql         # SQL that creates the posts table
  sequent_migrations.rb      # File above
  sequent_schema.rb          # automatically generated; similar to Rails schema
lib/                         # Contains your domain logic
  post/                      # Files are grouped by aggregate root
    commands.rb              # All post command go here
    events.rb                # All post events go here
    post_command_handler.rb  # Subscribes to post commands and dispatches post events
  post.rb                    # The aggregate root
post.rb                      # File used only for exporting the ones above
But following it is optional. Ours, for example, will be more like this:
app/
  projectors/
  records/

  sequent/
    wallet/
      commands.rb
      events.rb
      wallet_command_handler.rb
      wallet.rb
db/
  sequent/
	  wallet_records.sql
Now that we know the file structure, let's add the SQL file responsible for creating the Wallet table db/sequent/wallet_records.sql:
CREATE TABLE wallet_records%SUFFIX% (
    id serial NOT NULL,
    aggregate_id uuid NOT NULL,
    user_id character varying,
    balance decimal(10,2) DEFAULT 0,
    CONSTRAINT wallet_records_pkey%SUFFIX% PRIMARY KEY (id)
);

CREATE UNIQUE INDEX wallet_records_keys%SUFFIX% ON wallet_records%SUFFIX% USING btree (aggregate_id);
A key point to highlight is that it includes a column like user_id, which works even though the users table exists outside the Sequent ecosystem.
The aggregate_id column, used by Sequent, is essential for tracking and saving all the events that occur. This column maintains the relationship between the events and their associated data through the ID. We'll dive deeper into its role when we discuss the AggregateRoot later on.
You may have noticed some %SUFFIX% placeholders in the SQL. These are necessary for Sequent migrations, where Sequent rewrites tables and index, creating new temporary ones with names like wallet_records_1. We'll discuss these migrations in more detail later on.
With our sequent migration in place, we can add the WalletRecord, which is like a Rails ApplicationRecord, but for Sequent:
# app/records/wallet_record.rb

class WalletRecord < Sequent::ApplicationRecord
  belongs_to :user
end
Now it is time for us to create our regular User model, including the wallet <> user relation:
class User < ApplicationRecord
  has_one :wallet, class_name: "::WalletRecord"
end
The next step is creating the commands, which is the sequent layer used to fire the events.
The only commands our Wallet domain will have are: one for creating the wallet, another for adding money and another for drawing money:
# app/sequent/wallet/commands.rb

module Wallet
  module Commands
    class CreateWallet < Sequent::Command; end

    class AddMoney < Sequent::Command
      attrs amount: Float, source: String
      validates_presence_of :amount, :source
    end

    class DrawMoney < Sequent::Command
      attrs amount: Float, destination: String
      validates_presence_of :amount, :destination
    end
  end
end
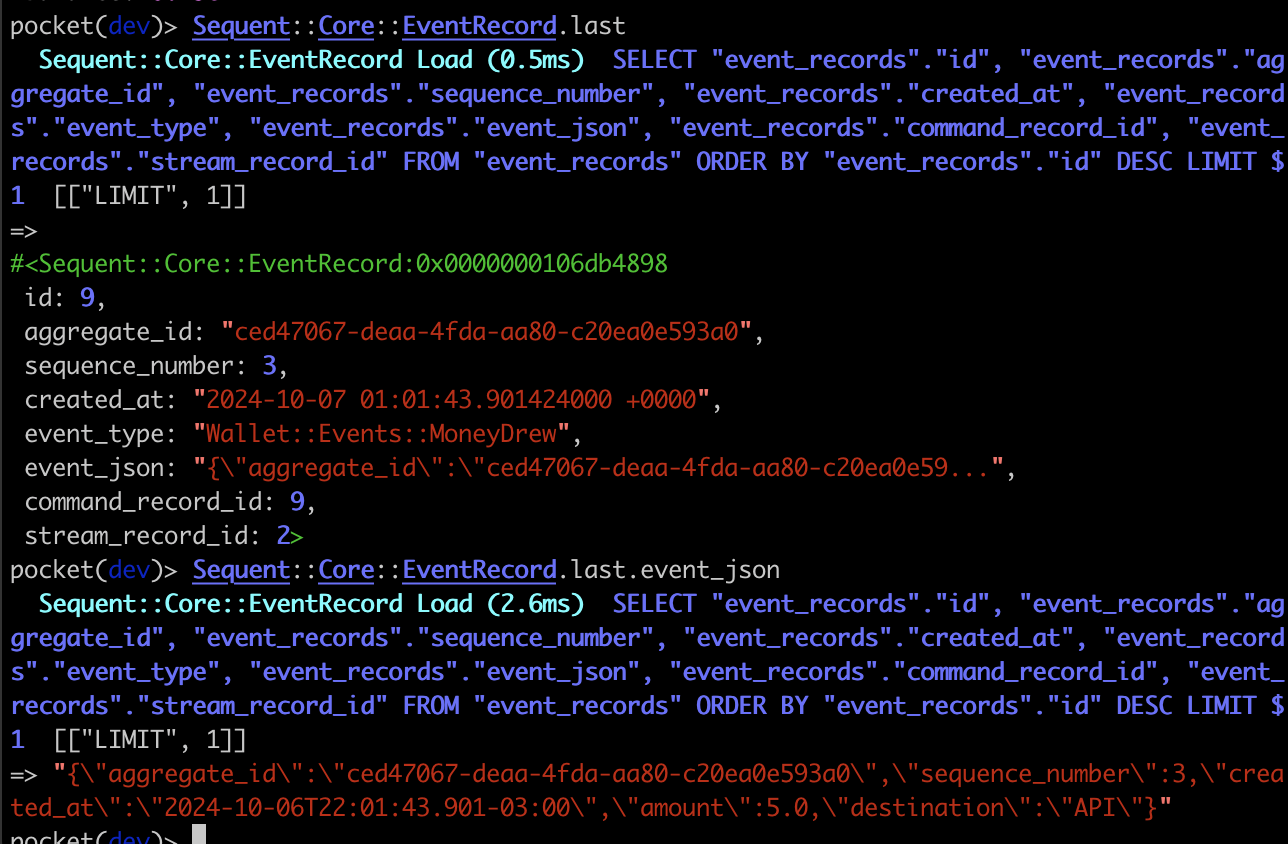
It's important to note that the attributes we see in each event aren't necessarily tied to the database tables we've defined. However, due to the nature of event sourcing, these attributes are stored in the database within a Sequent structure called Sequent::Core::EventRecord. We'll explore this in more detail later on.
Sequent allow us to add put any validation we want to run over our command attributes on this file. For us, the only thing that matters by now is the amount and source/destination.
The next class to be defined is the one that will represent our events. We'll have one event per command in our app:
# app/sequent/wallet/events.rb

module Wallet
  module Events
    class WalletCreated < Sequent::Event
      attrs user_id: String
    end

    class MoneyAdded < Sequent::Event
      attrs amount: Float, source: String
    end

    class MoneyDrew < Sequent::Event
      attrs amount: Float, destination: String
    end
  end
end
This setup allows us to apply and listen to each of the defined events. The file that typically handles the application of these events is wallet.rb, which resides within the Sequent structure.
# app/sequent/wallet/wallet.rb

module Wallet
  class Wallet < Sequent::AggregateRoot
    def initialize(command)
      super(command.aggregate_id)
      apply Events::WalletCreated, user_id: command.user_id
    end

    on Events::WalletCreated do |event|
      @user_id = event.user_id
    end

    def add_money(amount, source)
      apply Events::MoneyAdded, amount: amount, source: source
    end

    def draw_money(amount, destination)
      apply Events::MoneyDrew, amount: amount, destination: destination
    end
  end
end
This file is an AggregateRoot, which is the core model representing our business logic and maintaining the EventStream. This means it tracks all the events that have occurred for the associated model. Remember the aggregate_id we added in our SQL when generating the wallet table? That's the ID of the AggregateRoot! With this ID and the model's name, we can load all the related events into memory and query them as needed.
Sequent.aggregate_repository.load_aggregate(wallet_aggregate_id, Wallet::Wallet)You may have seen that the aggregate root is initialized by a command. That's because the file that calls this AggregateRoot file directly is our command handler. Let's build our one:
# app/sequent/wallet/command_handler

module Wallet
  class CommandHandler < Sequent::CommandHandler
    on ::Wallet::Commands::CreateWallet do |command|
      repository.add_aggregate(Wallet.new(command))
    end

    on ::Wallet::Commands::AddMoney do |command|
      do_with_aggregate(command, Wallet) do |wallet|
        wallet.add_money(command.amount, command.source, command)
      end
    end

    on ::Wallet::Commands::DrawMoney do |command|
      do_with_aggregate(command, Wallet) do |wallet|
        wallet.draw_money(command.amount, command.destination, command)
      end
    end
  end
end
In the CommandHandler file, you'll notice that whenever a command is sent, this file listens for it and calls the appropriate methods in the Wallet class, passing the necessary parameters. The handler for the ::Wallet::Commands::CreateWallet command is a bit different from the others. Since the AggregateRoot and database record don't exist yet, it has to create both from scratch. On the other hand, other handlers can simply use the wallet from the do_with_aggregate method, which, behind the scenes, performs the aggregate loading we just discussed.
The final piece of the puzzle is the projector, which we mentioned earlier when defining the Sequent migration file. The projector is responsible for updating the view model, ensuring that the data in our projections remains in sync with the events that have occurred. It listens for specific events and translates them into updates to the database tables, making it an essential part of keeping the event-sourced system coherent and responsive to changes.
# app/projectors/wallet_projector

class WalletProjector < Sequent::Projector
  manages_tables WalletRecord

  on ::Wallet::Events::WalletCreated do |event|
    create_record(WalletRecord, aggregate_id: event.aggregate_id, user_id: event.user_id, balance: 0.0)
  end

  on ::Wallet::Events::MoneyAdded do |event|
    update_record(WalletRecord, event) do |record|
      record.assign_attributes(
        balance: record.balance + event.amount
      )
    end
  end

  on ::Wallet::Events::MoneyDrew do |event|
    update_record(WalletRecord, event) do |record|
      record.assign_attributes(
        balance: record.balance - event.amount
      )
    end
  end
end
As you may have noticed, until now we haven't talked about yet any database writing. That's because the file that is in charge for it is this projector. When it listens the events applied by the aggregate root, it calls the create_record or update_record to write the database changes.
Another key point is the line with manage_tables, which appears at the beginning of the file, right below the class name. Remember, this file is referenced in the SequentMigrations file. When we run the Sequent migration, it recreates all the tables associated with the projectors listed in the version history. In our case, this would only recreate the Wallet table, ensuring it aligns with any updates defined by the projector.
Running our migrations
Now we are ready to actually create these tables on database by running the following migrations:
bundle exec rake sequent:db:create
bundle exec rake sequent:db:create_view_schema
bundle exec rake sequent:migrate:online
bundle exec rake sequent:migrate:offline- The first command only needs to be run once; it creates the database if it hasn’t been created yet.
- The second command is also a one-time setup—it creates the Sequent view schema.
- The third (and the fourth) needs to be run every time you make changes to the SequentMigration file. The online one, as the name says, is run with the rails server running. It basically recreates all our domain tables (like the Wallet for example) with the new things we have added in a new temporary table (named like
wallets_1, for example) - After the temporary tables are created, we run the fourth command, which executes the offline migrations. It’s crucial to shut down your server during this step because Sequent will replay all the stored events and perform a table switch—replacing the old table with the data from the new temporary one. If the server remains running, you risk losing any data changes that occur during this process. Fortunately, these migrations run quickly, so the required downtime is minimal.
Now we’re ready to execute some commands! The first command we can implement is one that creates a wallet for a user as soon as the user is created. To do this, we’ll add a Rails callback in the user model. Here's how you can add it:
class User < ApplicationRecord
  has_one :wallet, class_name: "::WalletRecord"

  after_create_commit :create_wallet

  def create_wallet
    uuid = Sequent.new_uuid
    Sequent.command_service.execute_commands(
      ::Wallet::Commands::CreateWallet.from_params({
        aggregate_id: uuid,
        user_id: id
      })
    )
  end
end
This is how sending a command to Sequent looks like. We either create a new UUID (that will be the aggregate_id) or get the id from an existing record. Since this is the creation and the record doesn't exist yet, we need to generate the UUID and send it when calling the command.
Now, with this callback done, we can go to rails console and create our user:
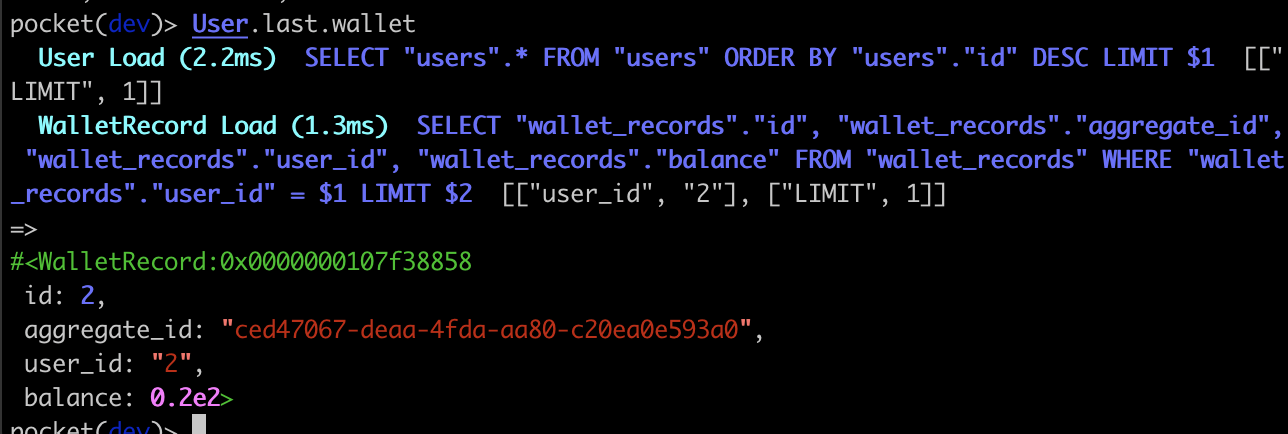
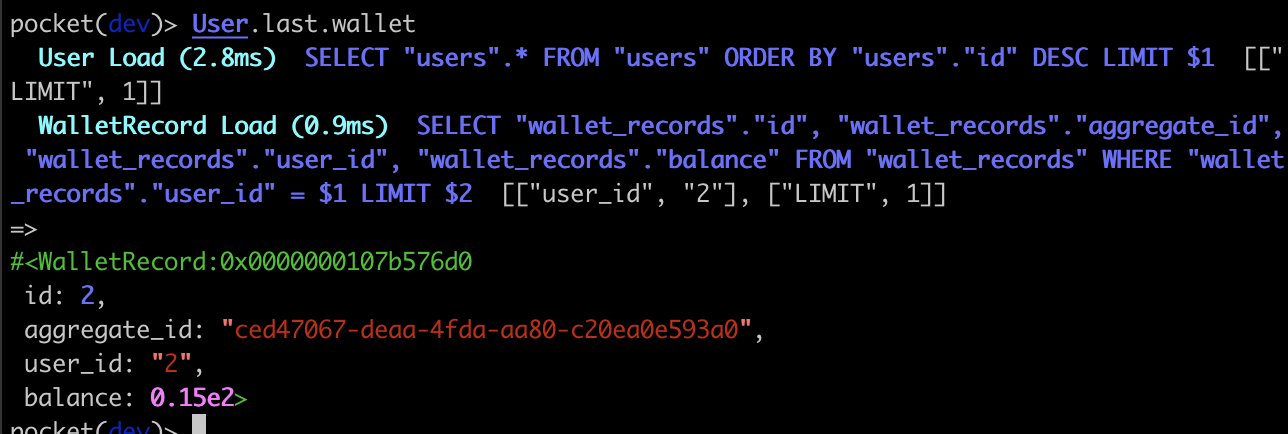
User.create!(name: "Gabriela")When retrieving the most recent user, you'll notice that they now have a wallet associated with them, confirming it has worked successfully! 🎉

Adding some API endpoints to Pocket
To make our app more practical, let's add some endpoints. For simplicity, we can place the logic directly in the controller. Here's how you can create a new controller for the User and set up the routes.
# config/routes

Rails.application.routes.draw do
  post "users/:id/add_money", to: "users#add_money"
  post "users/:id/draw_money", to: "users#draw_money"
  get "users/:id/transactions", to: "users#transactions"

  # ...
end
For now, let's just add the post methods to the user controller:
class UsersController < ApplicationController
  def add_money
    Sequent.command_service.execute_commands(
      ::Wallet::Commands::AddMoney.new(
        aggregate_id: wallet_aggregate_id,
        amount: params[:amount],
        source: params[:source]
      )
    )

    render json: { user: user, wallet: user.wallet }, status: :ok
  end

  def draw_money
    Sequent.command_service.execute_commands(
      ::Wallet::Commands::DrawMoney.new(
        aggregate_id: wallet_aggregate_id,
        amount: params[:amount],
        destination: params[:destination]
      )
    )

    render json: { user: user, wallet: user.wallet }, status: :ok
  end

  def transactions; end

  private

  def wallet_aggregate_id
    user.wallet.aggregate_id
  end

  def user
    User.find(params[:id])
  end
end
You can see that in this controller, we also call the Sequent command service, similar to how we did when creating the wallet. However, notice the key difference here: instead of generating a new aggregate_id, we're using the existing wallet's aggregate_id instead! This ensures that any commands sent will be applied to the correct wallet instance. Let’s test it out:
curl --location 'http://localhost:3000/users/2/add_money' \
--header 'Content-Type: application/json' \
--data '{
    "amount": 20,
    "source": "API"
}
'
Which should return the following output:
{
    "user": {
        "id": 2,
        "created_at": "2024-10-07T00:50:04.701Z",
        "updated_at": "2024-10-07T00:50:04.701Z",
        "name": "Gabriela"
    },
    "wallet": {
        "id": 2,
        "aggregate_id": "ced47067-deaa-4fda-aa80-c20ea0e593a0",
        "user_id": "2",
        "balance": "20.0"
    }
}
And it has persisted our values 🎉

Testing the draw endpoint:
curl --location 'http://localhost:3000/users/2/draw_money' \
--header 'Content-Type: application/json' \
--data '{
    "amount": 5,
    "destination": "API"
}
'
We should get the following result:
{
    "user": {
        "id": 2,
        "created_at": "2024-10-07T00:50:04.701Z",
        "updated_at": "2024-10-07T00:50:04.701Z",
        "name": "Gabriela"
    },
    "wallet": {
        "id": 2,
        "aggregate_id": "ced47067-deaa-4fda-aa80-c20ea0e593a0",
        "user_id": "2",
        "balance": "15.0"
    }
}
Perfect!! Now, let's add the transactions endpoint. We could have created something like a Transaction record to store a representation of each added/drew money, so the implementation of our endpoint would be easier to read. However, for didactic reasons, let's use here Sequent's internal tables. From these tables, we are able to fetch every single transaction:
class UsersController < ApplicationController
  # ...

  def transactions
    transactions = Sequent::Core::EventRecord
      .where(
        aggregate_id: wallet_aggregate_id,
        event_type: ["Wallet::Events::MoneyAdded", "Wallet::Events::MoneyDrew"])
      .order(:sequence_number)
      .select([
        "id",
        "CASE event_type WHEN 'Wallet::Events::MoneyAdded' THEN 'IN' ELSE 'OUT' END as type",
        "event_json::json->'amount' as amount",
        "event_json::json->'created_at' as date"
      ])

    render json: { balance: user.wallet.balance, transactions: transactions }, status: :ok
  end

  #...
end
The EventRecord class logs every single event applied in our app. Here's what we're doing with these events:
- Filtering by
aggregate_id: We're narrowing down the events to only those related to the wallet'saggregate_id, ensuring we're looking at wallet-specific events. - Filtering by event types: We're focusing on events of type
MoneyAddedandMoneyDrew(for example, other types likeWalletCreatedexist but are not included in this query). - Ordering by
sequence_number: This ensures we view the events in the order they occurred, preserving the correct sequence of actions. - Selecting relevant data: We are extracting the key details—event ID, event type (which is mapped to a more user-friendly name), the amount, and the timestamp of when the event was fired.
It’s important to notice that attributes like amount or created_at are stored as part of a JSON string inside the event_json column. This structure not only holds essential fields for the wallet but also includes additional parameters sent with the event, such as source and destination—even if these fields are not part of the wallet table.

An important point to remember is that, since Sequent stores the entire event stream, you should never manually delete a WalletRecord using something like WalletRecord.find(10).destroy!. Doing so won't log the deletion as an event in the event stream. If your application needs to handle the deletion of a Sequent record, this should be done through the WalletProjector, by creating the appropriate events and commands to represent the action.
Going back to our transactions, now we can see the events that were fired from the user’s wallet when fetching the list of transactions:
curl --location 'http://localhost:3000/users/2/transactions'Which should return:
{
    "balance": "15.0",
    "transactions": [
        {
            "id": 8,
            "type": "IN",
            "amount": 20.0,
            "date": "2024-10-06T21:58:57.499-03:00"
        },
        {
            "id": 9,
            "type": "OUT",
            "amount": 5.0,
            "date": "2024-10-06T22:01:43.901-03:00"
        }
    ]
}
Just like it was expected!
Final considerations
Sequent is a powerful tool that provides a robust system for event sourcing. It is especially valuable when you need to track, replay, and manage events over time. While this guide gives you a basic introduction to get started, there is much more to explore. To dive deeper into Sequent's features and capabilities, you can refer to their documentation. This tutorial is just the first step in guiding you into the world of event sourcing with Sequent.


